Buttons
A button component can be used to respond to button presses, from buttons you create. You’ll need to create and send these buttons yourself, so let’s get started by creating a simple slash command to do so:
import { ButtonBuilder, ActionRowBuilder, ButtonStyle } from 'discord.js';import { command } from 'jellycommands';
export default command({    name: 'create-a-button',    description: 'Creates a test button you can press!',
    async run({ interaction }) {        // Create our button with the button builder        const button = new ButtonBuilder()            .setCustomId('test')            .setLabel('test')            .setStyle(ButtonStyle.Primary);
        // All components need to be in a "row"        const row = new ActionRowBuilder<ButtonBuilder>().addComponents(button);
        await interaction.reply({            content: 'Click the button below so we can test responding to it:',            // Send the row of components            components: [row],        });    },});
import { ButtonBuilder, ActionRowBuilder, ButtonStyle } from 'discord.js';import { command } from 'jellycommands';
export default command({ name: 'create-a-button', description: 'Creates a test button you can press!',
async run({ interaction }) { // Create our button with the button builder const button = new ButtonBuilder() .setCustomId('test') .setLabel('test') .setStyle(ButtonStyle.Primary);
// All components need to be in a "row" const row = /** @type {ActionRowBuilder<ButtonBuilder>} */ ( new ActionRowBuilder() ).addComponents(button);
await interaction.reply({ content: 'Click the button below so we can test responding to it:', // Send the row of components components: [row], }); },});Once we run this command we now see a button in chat!
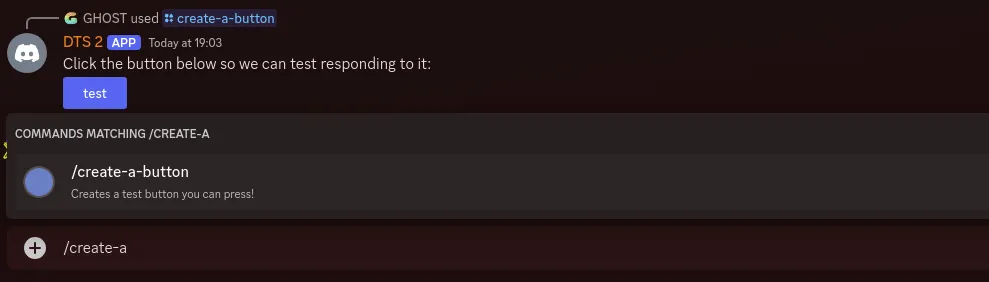
You’ll notice that when you click the button it fails:

This is where the JellyCommands comes in, it allows us to create a button component that can respond to button presses. All we need is the buttons “custom id”, which you might have noticed us setting in the above example.
import { button } from 'jellycommands';
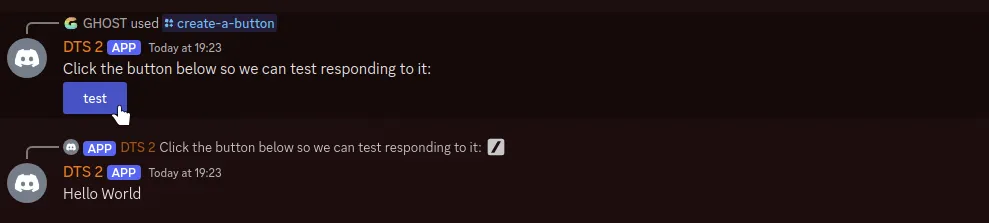
export default button({ id: 'test',
async run({ interaction }) { await interaction.reply({ content: 'Hello World', }); },});Now when we click the button we see that it sends our “Hello World” response!
The “custom id” system is very powerful, allowing for dynamic matching to store arbitrary data. Learn more about custom ids.